| Home > The First 5 Minutes with ZW3D |
 The First 5 Minutes with ZW3D
Let's take ZW3D for a quick test drive. We'll create a new ZW3D file and a new part at the same time. Then we'll use a sketch to create a simple extruded shape. After viewing the part in different display modes and learning about Dynamic View, we'll save the file. You now have the keys. Lets go for a ride!
-
From your desktop (or from your user directory using Windows Explorer) select the ZW3D.exe icon to launch ZW3D.
ZW3D.exe Icon
The ZW3D splash screen will appear while the program loads. Once ZW3D is loaded, you need to create a file to work in.
-
Pick File > New or pick Create a new file from the Tool Bar or press (Ctrl+N) to display the New File/Object Form.
-
This form allows you to create a new file and a root object (e.g., part/assembly, drawing sheet, etc.) at the same time. Select the Part/Assembly icon. Type TEST DRIVE.Z3 in the Name field and then pick OK. You are then moved to the Part Level.
Now we can create some geometry.
-
You will notice that in the Required Inputs section of the Command Options Form, ZW3D is asking you to select a profile to extrude. Since we have no geometry yet, let's create a sketch right now, in the middle of this command.
Right-click in the graphic window and select Insert Sketch in the popup menu. ZW3D allows you to pause many commands and use right-click input options.
-
The Extrude command is paused and the Insert Sketch command is executed. Now middle-click to accept the world XY datum plane.
-
Now you're at the Sketch Level. ZW3D is a multi-level application. Each level is used to create or manage different objects like parts and assemblies, sketches, drawings, etc. You are moved to the sketch level automatically during any command that can accept a sketch as input.
-
From the ReadySketch Tool Tab, pick the Circle icon.
ZW3D provides numerous sketches that are predefined and ready to insert "on-the-fly." This makes sketching fast and easy.
-
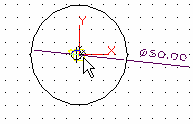
You will see a preview of the circle as you move the cursor around. ZW3D is waiting for you to select an insertion point for the ReadySketch Circle. Select the 0,0 location or enter 0,0 into the Base field of the Options Form that is now displayed.
-
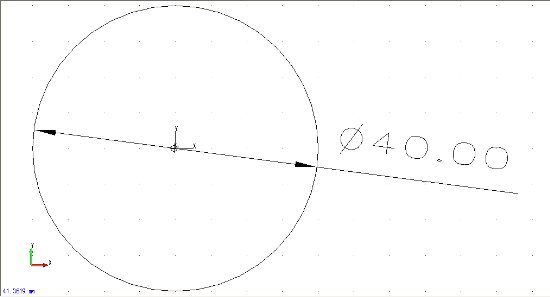
ReadySketches come with pre-defined dimensions that you can edit to suit your needs.
Now, double-click on the circle diameter dimension and enter 40.00 into the Input Dimension Value Form.
-
Right-click and pick Exit Sketch from the popup menu or pick
from the Toolbar to exit the sketch.
You are now back at the Part Level, ready to complete the Extrude command.
-
In the Required Inputs section of the Options Form, enter 0 for the Start of the extrusion.
-
Enter 35 for the End. The extruded shape is now complete.
-
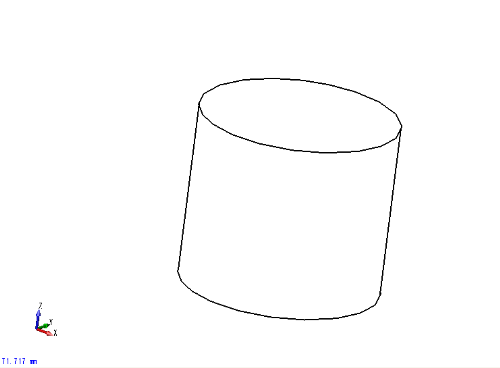
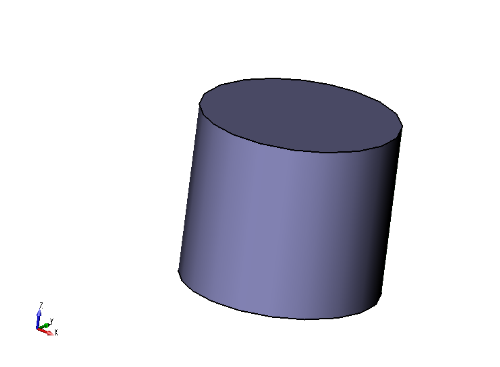
Pick View > Hidden Line to see the part as shown in the figure above. Now pick View > Shade to change to a shaded display.
 You can also pick from the Toolbar or simply press (Ctrl+F). ZW3D provides multiple ways of performing tasks. Choose methods that are most comfortable for you. You can also
Customize ZW3D to create your own User Tool Bars and keyboard shortcuts.
You can also pick from the Toolbar or simply press (Ctrl+F). ZW3D provides multiple ways of performing tasks. Choose methods that are most comfortable for you. You can also
Customize ZW3D to create your own User Tool Bars and keyboard shortcuts.
-
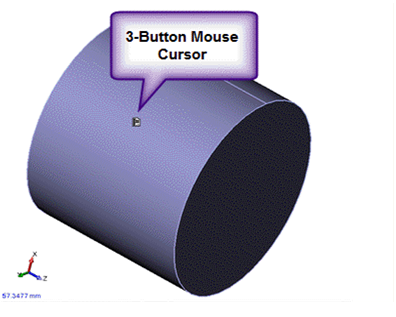
(Press and hold the right mouse button) as you drag the cursor in a circular pattern. The part will dynamically rotate. Drag middle mouse button to pan and roll middle button to zoom.
-
If you wish you can pick File > Save or pick
from the Tool Bar to save your file. The File Browser is displayed to select the location of your file. Pick Save to save it.
Congratulations! You have just created your first ZW3D part. Now select Help > Help Browser... to learn more about ZW3D or press F1 to display help for each ZW3D command you select.
Have Fun!